从Wordpress到Github,最后再到七牛云,我的网站也是命运多舛呀。随着互联网技术的发展,以后可能会选择其他的网站进行托管,但无论怎样,静态博客站点可能是我会一直坚持的。如今我把本网站全部放在七牛云,由于访问量少,所以每个月流量就几毛钱(如果仅仅是七牛云的国内HTTP流量,10G以内是完全免费的)。虽然用七牛云托管已经有一年多的时间了,但是最近才把全站的所有内容搞成HTTPS的,这里简单记录一下整个过程。
托管静态内容
首先,使用
hexo等静态站点生成工具生成静态网站全部内容。在七牛云注册帐号并在
对象存储里面新建存储空间,空间必须设置为公开空间由于网页版无法使用上传文件夹到空间里面去,所以需要借助专门的上传工具,mac上并没有图形界面上传工具,我这里没有用命令行工具,而是用的Python SDK自己写了个命令行工具,该工具能够做到删除多余的文件,只上传新建及修改过的文件qiniu-for-static-web-hosting 同步文件夹至七牛云
1
2
3
4
5
6
7
8
9
10
11
12
13
14
15
16
17
18
19
20
21
22
23
24
25
26
27
28
29
30
31
32
33
34
35
36
37
38
39
40
41
42
43
44
45
46
47
48
49
50
51
52
53
54
55
56
57
58
59
60
61
62
63
64
65
66
67
68
69
70
71
72
73
74
75
76
77
78
79
80
81
82
83
84
85
86
87
88
from qiniu import Auth, put_file, etag, urlsafe_base64_encode, BucketManager
from typing import List, Dict
import os
from qiniu import build_batch_delete
class Sync:
"""
同步目录至七牛云
"""
def __init__(
self,
access_key: str,
secret_key: str,
bucket_name: str,
sync_dir: str,
exclude: List,
cover: bool,
remove_redundant: bool,
):
self.bucket_name = bucket_name
self.q = Auth(access_key, secret_key)
self.bucket = BucketManager(self.q)
self.sync_dir = sync_dir
self.exclude = exclude
self.cover = cover
self.remove_redundant = remove_redundant
self.sync()
def sync(self):
"""
同步操作
:return:
"""
remote_files = self.list_remote()
local_files = self.list_local()
# 首先删除远端仓库中多余的文件
remove_remote_files = []
for remote_filename in remote_files:
if remote_filename not in local_files:
remove_remote_files.append(remote_filename)
self.bucket.batch(build_batch_delete(self.bucket_name, remove_remote_files))
# 上传本地文件到远端(仅上传远端不存在的以及修改过的)
for local_filename in local_files:
if (
local_filename not in remote_files
or local_files[local_filename]["hash"]
!= remote_files[local_filename]["hash"]
):
print("puting " + local_filename)
ret, info = put_file(
self.q.upload_token(self.bucket_name, local_filename, 3600),
local_filename,
local_files[local_filename]["fullpath"],
)
def list_remote(self) -> Dict:
"""
列出远程仓库所有的文件信息
:return: List
"""
result = {}
for file in self.bucket.list(self.bucket_name)[0]["items"]:
result[file["key"]] = file
return result
def list_local(self) -> Dict:
"""
列出本地仓库所有的文件信息
"""
files = {}
def get_files(path):
for filename in os.listdir(path):
if filename in self.exclude:
continue
fullpath = os.path.join(path, filename)
if os.path.isfile(fullpath):
key = fullpath.split(self.sync_dir)[1]
files[key] = {"fullpath": fullpath, "hash": etag(fullpath)}
else:
get_files(fullpath)
get_files(self.sync_dir)
return files
if __name__ == "__main__":
Sync(
access_key="", # access_key
secret_key="", # secret_key
bucket_name="blog", # bucket_name
sync_dir="", # 静态文件目录(后面必须有斜杠/)
exclude=[".DS_Store"],
cover=True,
remove_redundant=True,
)
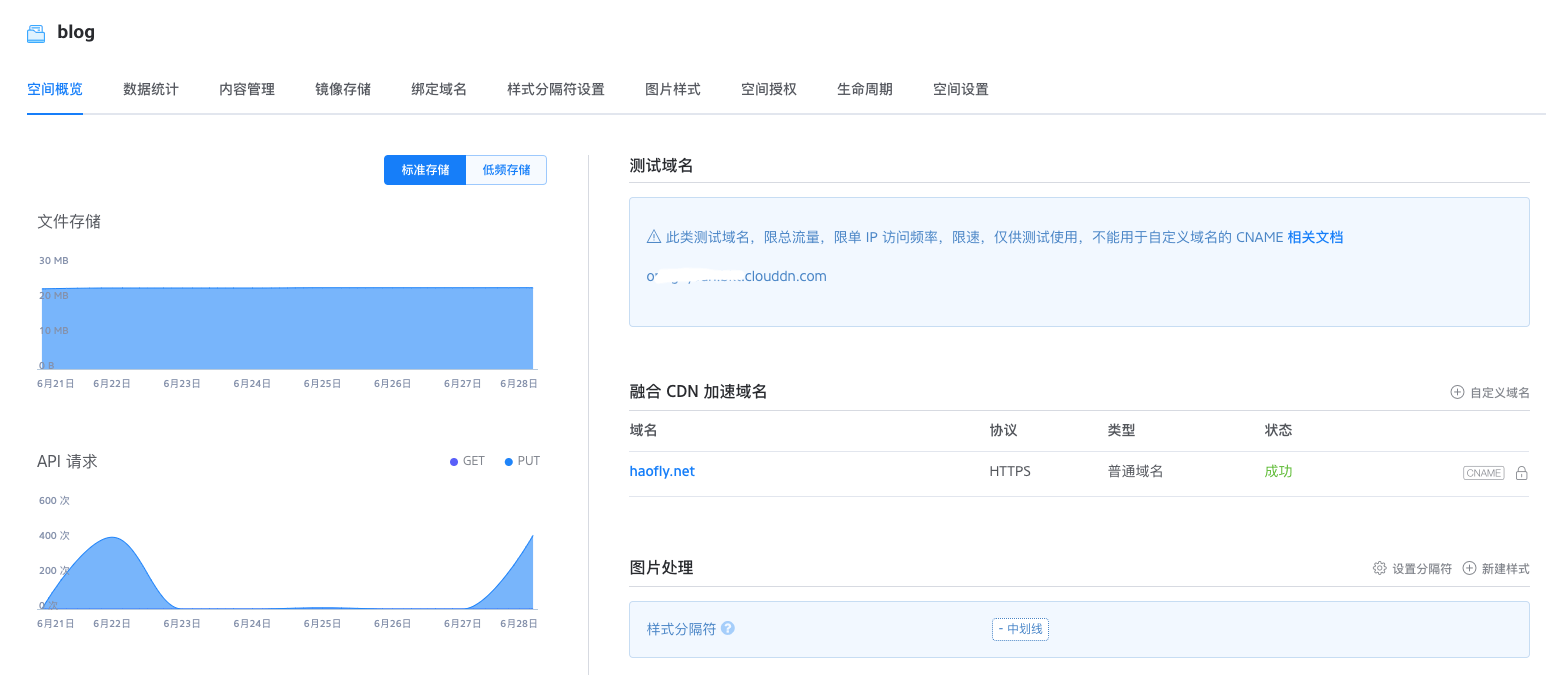
绑定自定义域名
完成上面一步后还只能使用类似xxxxx.bkt.clouddn.com这样的测试域名进行访问,既然是自己的博客当然希望用自己的域名啦,不过需要注意的是,国内厂商的web服务要绑定自定义域名的话,域名都必须得先备案,这一点如果不能满足,我就爱莫能助了。绑定自定义域名步骤:
在
存储空间->绑定域名处创建域名。覆盖范围直接选择全球;通信协议选择HTTPS,此时会让你选择SSL证书,没有证书也没有关系,进入证书管理页面申请七牛提供的免费的证书即可;最好开启强制HTTPS访问选项;其他参数默认即可。设置域名解析。在自己的域名管理后台设置域名解析,添加CNAME记录,主机记录为
@,记录值为七牛提供的类似xxx.qiniudns.com的记录值成功则如下图所示


